
Reference: https://docker-curriculum.com/
基本概念
- image <=> 镜像:一个模板,包含了运行某个应用程序所需的一切,比如代码、运行时环境、库和配置等。
- container <=> 容器:镜像的可执行实例,利用镜像构建运行时环境,可以启动、停止、删除和交互。
- Docker Hub <=> Docker 仓库,存储着大量可用镜像。
- Docker daemon <=> docker 守护进程/引擎,它提供 Docker API 接口并管理容器。用户使用 docker 命令,然后 docker 命令会通过 Docker API 对守护进程发起请求,以执行对容器的相关操作。如果守护进程停止或者重启,所有的容器都会停止或重启。
Docker 基本命令
拉取和检查 image
docker pull 命令可以拉取可用的 image:
docker pull busybox
# stdout
Using default tag: latest
latest: Pulling from library/busybox
9c0abc9c5bd3: Pull complete
Digest: sha256:a5d0ce49aa801d475da48f8cb163c354ab95cab073cd3c138bd458fc8257fbf1
Status: Downloaded newer image for busybox:latest
docker.io/library/busybox:latest
可以使用 docker images 命令来查看本地有哪些 image
docker images
# example stdout
REPOSITORY        TAG          IMAGE ID       CREATED        SIZE
init              latest       1685da567cfe   29 hours ago   266MB
<none>            <none>       71b2386e14aa   35 hours ago   77.9MB
vcpkg_installed   latest       4b5dd309337d   35 hours ago   77.9MB
koa-demo          latest       3ef13caf5890   6 days ago     677MB
hello-world       latest       74cc54e27dc4   2 weeks ago    10.1kB
ubuntu            latest       b1d9df8ab815   2 months ago   78.1MB
busybox           latest       af4709625109   4 months ago   4.27MB
php               5.6-apache   24c791995c1e   6 years ago    355MB
从 image 运行 container
docker run 会先检查本地是否已经有指定的 image(没有则尝试拉取),然后从这个 image 创建一个 container
docker run busybox echo "hello from busybox"
# stdout
hello from busybox
如上的命令从本地的 busybox image 创建了 container,并让它执行了命令 echo "hello from busybox"。
可以使用 docker ps 命令来查看当前正在运行的 container
docekr ps
# stdout
CONTAINER ID   IMAGE     COMMAND   CREATED   STATUS    PORTS     NAMES
可以发现什么在运行的容器都没有。这是因为之前建立的 container 在执行了 echo 命令后就光荣退役了。
我们可以再使用 docker ps -a 来查看所有的 container
docker ps -a
# example stdout
CONTAINER ID   IMAGE                    COMMAND                  CREATED              STATUS                          PORTS     NAMES
a7ce83fb76c1   busybox                  "echo 'hello from bu…"   About a minute ago   Exited (0) About a minute ago             nervous_taussig
56ca32f9766d   hello-world              "/hello"                 13 minutes ago       Exited (0) 13 minutes ago                 hungry_haibt
91236c261621   vcpkg_installed:latest   "bash"                   34 hours ago         Exited (0) 29 hours ago                   blissful_johnson
想要让容器不止执行一个命令?一个可能的想法是进入容器,然后在里面执行一些命令。这时,我们可以用
docekr run -it busybox sh
# 在镜像名后面指定需要使用的交互工具,常见的选择为 bash,此处为 sh
这时,你大概率会发现你的终端提示符不太一样了,这表明你进入了容器内部。一个通用的检查方法是:ls 一下吧
# in the container
ls
# stdout
bin   dev   etc   home  proc  root  sys   tmp   usr   var
想要退出这个容器,只需要运行 exit 就可以了。
这时,如果你再一次 docker ps -a,你会发现有了两个 busybox 容器。
docker ps -a
CONTAINER ID   IMAGE                    COMMAND                  CREATED          STATUS                      PORTS     NAMES
a12779762bd0   busybox                  "sh"                     8 minutes ago    Exited (0) 5 minutes ago              priceless_murdock
a7ce83fb76c1   busybox                  "echo 'hello from bu…"   17 minutes ago   Exited (0) 17 minutes ago             nervous_taussig
删除容器
为了在容器工作完成后立刻删除它,你可以在 docker run 时添加参数 --rm,如 docker run busybox --rm
你也可以通过指明待删除容器 id 的方式删除已有容器。如果删除成功,会返回被删除的容器 id。
docker rm a12779762bd0 a7ce83fb76c1
# stdout
a12779762bd0
a7ce83fb76c1
如果希望删除所有的不在工作的容器,可以使用 docker container prune
docker container prune
# example stdout
WARNING! This will remove all stopped containers.
Are you sure you want to continue? [y/N] y
Deleted Containers:
56ca32f9766d03f4ed2142e535df07eee9bf5a9d5870bc7c8c3f4861501a118c
91236c261621a3d45375ad73b4f1d83633e553efc45ab9988dc06ca38a50ce7c

Total reclaimed space: 75B
删除镜像
使用 docker rmi 加指定 id 的方式可以删除镜像
# example
docker rmi 71b2386e14aa
Deleted: sha256:71b2386e14aab3e2711bee1f743ed6c5106886a40820ecee5ce528a0b5e5ff93
用 docker 运行静态网站
处于学习角度,我们先拉取一个带有静态网页的镜像
docker run --rm -it prakhar1989/static-site
# stdout
Unable to find image 'prakhar1989/static-site:latest' locally
latest: Pulling from prakhar1989/static-site
d4bce7fd68df: Pull complete
a3ed95caeb02: Pull complete
573113c4751a: Pull complete
31917632be33: Pull complete
77e66f18af1c: Pull complete
df3f108f3ade: Pull complete
d7a279eb19f5: Pull complete
e798589c05c5: Pull complete
78eeaf458ae0: Pull complete
Digest: sha256:bb6907c8db9ac4c6cadb25162a979e286575cd8b27727c08c7fbaf30988534db
Status: Downloaded newer image for prakhar1989/static-site:latest
Nginx is running...
你可以看到服务器已经在工作了。然而,我们的网站在哪里呢?它在哪个端口运行?
暴露端口
我们退出容器,重新使用下面的命令
docker run -d -P --name static-site prakhar1989/static-site
# exapmle stdout
24eabde8f23d1d10441890eabee703f5cb61e4c8b8e244f5c1ac8447a1c762e3
这里用到了多个 flag:
- -d 启用 detached 模式,使得容器在后台运行,不占用当前的终端
- —name 为容器指定了名称,这里是 static-site
- -P 会将容器内部的端口映射到宿主机上随机分配的端口。这样,我们就可以通过宿主机的端口来访问容器内的服务了
那么,究竟映射到了哪些端口呢?可以通过 docker port 命令来检查
docker port static-site
# example stdout
80/tcp -> 0.0.0.0:56904
80/tcp -> [::]:56904
443/tcp -> 0.0.0.0:56905
443/tcp -> [::]:56905
443 端口是容器中 Nginx 默认暴露出的 HTTPS 端口,可能需要在容器中配置 HTTPS 证书才能访问。方便起见,我们以 80 端口为例。
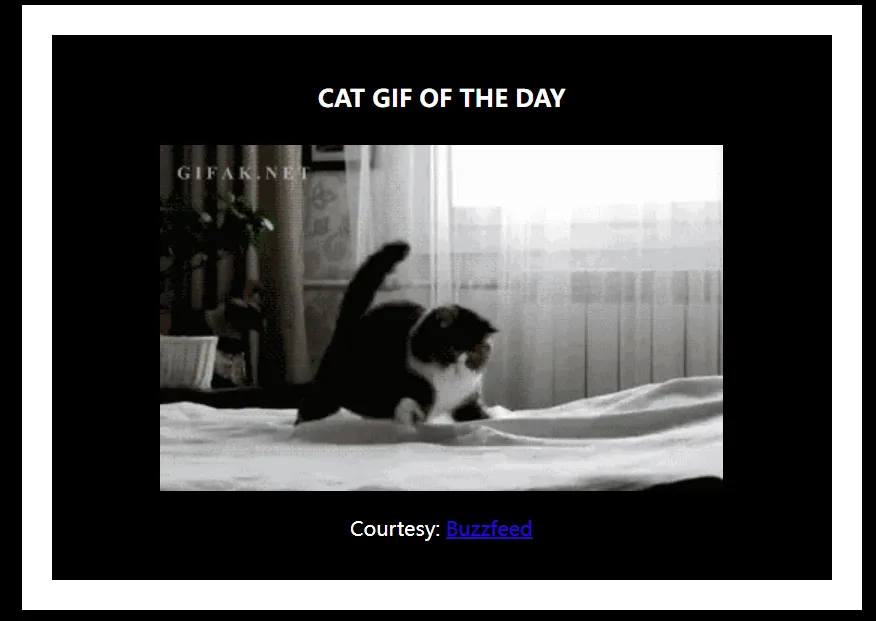
这时我们就可以访问 localhost:56904,应当看到如下页面:

很简单不是吗?
停止容器
使用 docker stop 停止这个容器。
docker stop static-site
# stdout
static-site
在运行容器时指定端口
上面我们已经知道了,容器内部的端口为 80。于是,我们可以通过 -p flag 来指定内外端口映射关系
# 将容器的 80 端口映射到宿主机的 8888 端口
docker run -p 8888:80 prakhar1989/static-site
# stdout
Nginx is running...
现在,就可以访问 localhost:8888,看到同样的页面了。
制作自己的 docker 镜像
镜像的种类
大多数情况下,我们都是先拉取以一个 docker 镜像作为出发点,在它的基础上制作。那么,了解镜像的种类就是必要的。
就依赖关系,镜像分为
- Base images:没有依赖的镜像,往往是系统镜像,比如一个 ubuntu 镜像
- Child images:依赖于其它镜像的镜像
就维护者,镜像分为
- Official images:由官方维护的镜像,典型的是
hello-world镜像。 - User images:由不同的用户创建并维护的镜像。在命名上,它们比官方镜像多一个用户名前缀,即
<user>/<image-name>。
搜索镜像
使用 docker search 命令可以搜索镜像
docker search ubuntu
# example stdout
NAME                             DESCRIPTION                                     STARS     OFFICIAL
ubuntu                           Ubuntu is a Debian-based Linux operating sys…   17472     [OK]
ubuntu/squid                     Squid is a caching proxy for the Web. Long-t…   105
ubuntu/nginx                     Nginx, a high-performance reverse proxy & we…   126
ubuntu/cortex                    Cortex provides storage for Prometheus. Long…   4
ubuntu/kafka                     Apache Kafka, a distributed event streaming …   53
ubuntu/apache2                   Apache, a secure & extensible open-source HT…   86
ubuntu/bind9                     BIND 9 is a very flexible, full-featured DNS…   101
ubuntu/prometheus                Prometheus is a systems and service monitori…   70
ubuntu/zookeeper                 ZooKeeper maintains configuration informatio…   13
ubuntu/mysql                     MySQL open source fast, stable, multi-thread…   67
ubuntu/postgres                  PostgreSQL is an open source object-relation…   40
ubuntu/redis                     Redis, an open source key-value store. Long-…   23
ubuntu/jre                       Distroless Java runtime based on Ubuntu. Lon…   19
ubuntu/dotnet-aspnet             Chiselled Ubuntu runtime image for ASP.NET a…   23
ubuntu/grafana                   Grafana, a feature rich metrics dashboard & …   12
ubuntu/cassandra                 Cassandra, an open source NoSQL distributed …   2
ubuntu/dotnet-deps               Chiselled Ubuntu for self-contained .NET & A…   16
ubuntu/memcached                 Memcached, in-memory keyvalue store for smal…   5
ubuntu/prometheus-alertmanager   Alertmanager handles client alerts from Prom…   9
ubuntu/dotnet-runtime            Chiselled Ubuntu runtime image for .NET apps…   20
ubuntu/python                    A chiselled Ubuntu rock with the Python runt…   20
ubuntu/mlflow                    MLFlow: for managing the machine learning li…   5
ubuntu/telegraf                  Telegraf collects, processes, aggregates & w…   4
ubuntu/loki                      Grafana Loki, a log aggregation system like …   2
ubuntu/chiselled-jre             [MOVED TO ubuntu/jre] Chiselled JRE: distrol…   3
Dockerfile
在项目的构建中,为了保证环境统一,我们常常需要构建自己的 docker 镜像。我们可以把相关操作放在一个 Dockerfile 文件中,然后通过它生成镜像。
就让我们选择一个可以随机生成猫猫 gif 的 python 项目作为练习吧!
git clone https://github.com/prakhar1989/docker-curriculum.git
cd docker-curriculum/flask-app
因为 python 包的一些破坏性更新,这个项目不能直接使用,我们修改 flask-app 中的 requirement.txt:
Flask==2.1.3
Werkzeug==2.3.7
在项目目录下,我们可以看见一个 Dockerfile 文件。它的内容如下:
FROM python:3.8

# set a directory for the app
WORKDIR /usr/src/app

# copy all the files to the container
COPY . .

# install dependencies
RUN pip install --no-cache-dir -r requirements.txt

# tell the port number the container should expose
EXPOSE 5000

# run the command
CMD ["python", "./app.py"]
这里面涉及一些基本的 Dockerfile 命令,让我们一一讲解。
FROM python:3.8指定了我们的镜像在 python:3.8 这个 base image 的基础上构建WORKDIR /usr/src/app指定了工作目录,之后所有命令都默认在此执行COPY . .把指定文件复制到镜像临时容器的指定位置中,这里是把所有文件复制到了工作目录RUN pip install --no-cache-dir -r requirements.txt即通过RUN来在镜像临时容器内执行命令EXPOSE 5000指定要将容器内部的哪一个网络端口暴露出来CMD ["python", "./app.py"]指定了构建好镜像后,我们使用docker run从它运行容器时默认执行的命令
docker build
使用 docker build 命令可以从 Dcokerfile 创建一个新的镜像。
# docker build 接受一个参数,用于指明包含 Dockerfile 的目录
# 这里 docker build 还使用了一个 flag -t,用于为镜像赋予一个 tag
# tag 的前缀一般建议用你的用户名
docker build -t crazyspotteddove0/catnip .
# example stdout
[+] Building 6.1s (9/9) FINISHED                                                                                                                         docker:default
=> [internal] load build definition from Dockerfile                                                                                                                0.0s
=> => transferring dockerfile: 340B                                                                                                                                0.0s
=> [internal] load metadata for docker.io/library/python:3.8                                                                                                       1.5s
=> [internal] load .dockerignore                                                                                                                                   0.0s
=> => transferring context: 2B                                                                                                                                     0.0s
=> [1/4] FROM docker.io/library/python:3.8@sha256:d411270700143fa2683cc8264d9fa5d3279fd3b6afff62ae81ea2f9d070e390c                                                 0.0s
=> [internal] load build context                                                                                                                                   0.0s
=> => transferring context: 200B                                                                                                                                   0.0s
=> CACHED [2/4] WORKDIR /usr/src/app                                                                                                                               0.0s
=> CACHED [3/4] COPY . .                                                                                                                                           0.0s
=> [4/4] RUN pip install --no-cache-dir -r requirements.txt                                                                                                        4.2s
=> exporting to image                                                                                                                                              0.2s
=> => exporting layers                                                                                                                                             0.1s
=> => writing image sha256:e38fe3a6e779f9bdda810c8b9b1b643b346e12af8c16ef56e5ae49bc2039d2f1                                                                        0.0s
=> => naming to CrazySpottedDove/catnip                                                                                                                            0.0s
由于网络问题,上面的命令可能会失败。你可以尝试首先确认宿主机代理正常,并改用命令
docker build -t <user_name>/catnip --network host .,这会强制临时容器使用宿主机网络
现在,我们可以在 docker images 中看到新建立的镜像了:
REPOSITORY                TAG          IMAGE ID       CREATED         SIZE
crazyspotteddove0/catnip   latest       e38fe3a6e779   3 minutes ago   1.01GB
利用使用 docker 运行静态网页中提到的方法,验证一下镜像的可用性吧!
docker run -p 8888:5000 CrazySpottedDove/catnip --rm
你应当可以在 localhost:8888 中看到一张随机的猫猫!
上传自己的 docker 镜像
我们已经可以制作自己的 docker 镜像并创建出可用的容器实例了。这很好,但是,如果我想要把它方便地分发出去呢?
登录
如果还没有上传过自己的镜像, docker 会要求你先登录。建议使用的信息和 Docker Hub 账户相同。
docker login
发布镜像
# 通过 docker push 发布镜像
docker push user_name/image_name
# for example
docker push crazyspotteddove0/catnip
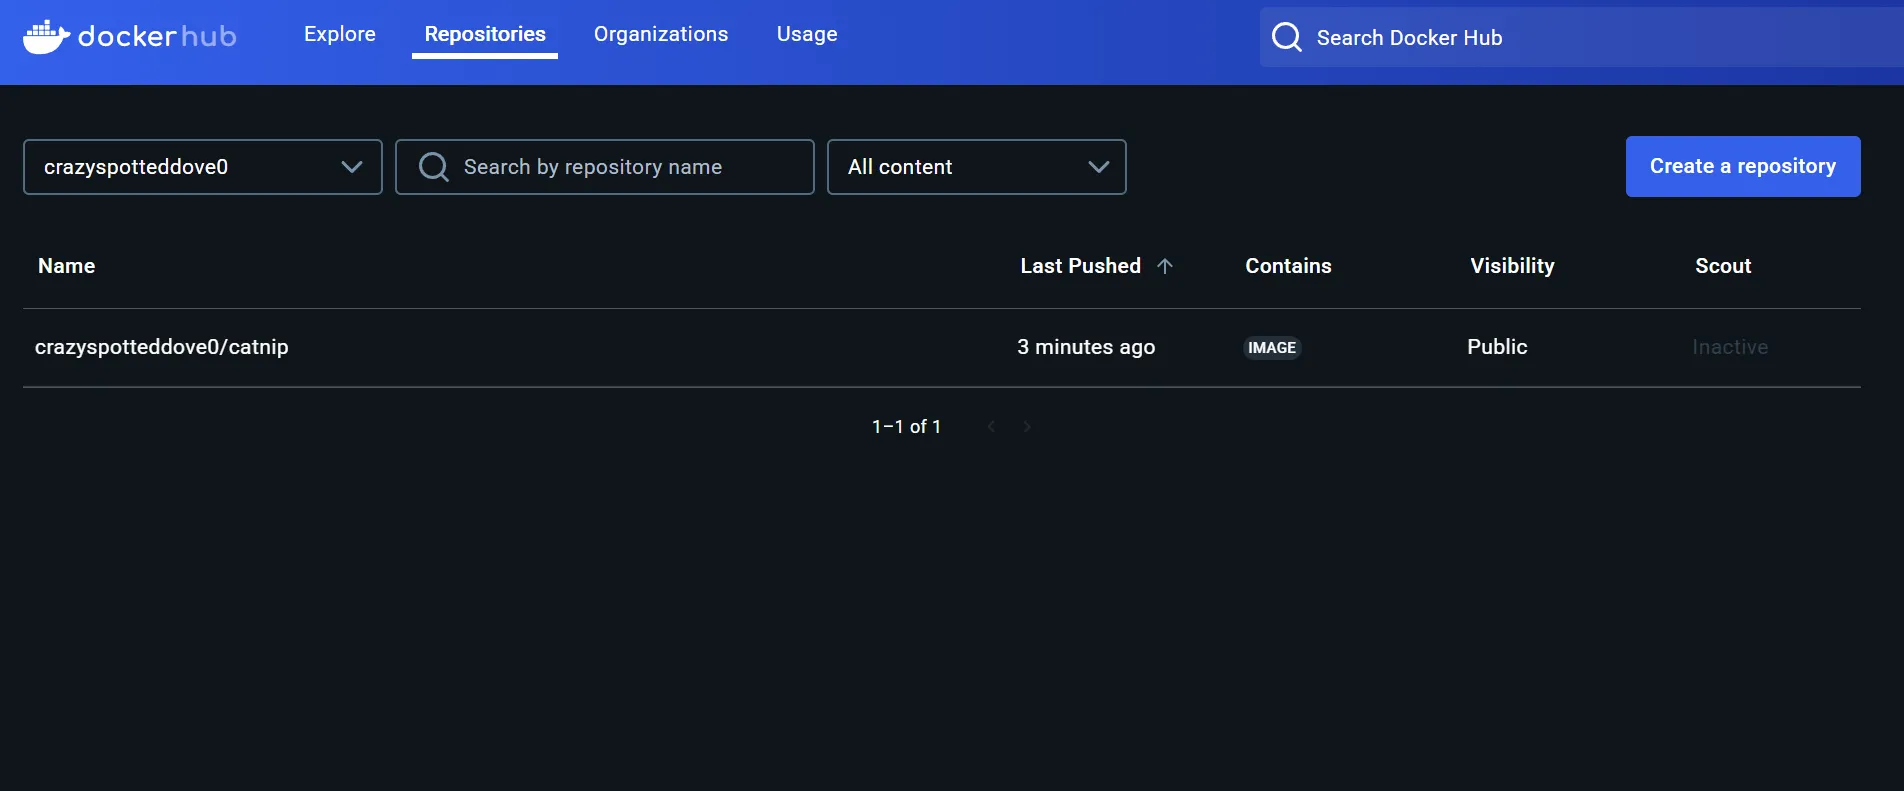
成功上传后,你应当能在 Docker Hub 账号中找到属于自己的镜像了:
现在,任何拥有 docker 的人想要使用这个应用,都可以直接使用
# for example
docker run -p 8888:5000 crazyspotteddove0/catnip
实例:构建项目并使用
构建
我们从一个 Dockerfile 来看构建一个 C++ 项目的步骤。该项目需要使用 vcpkg, clang-18, ninja, cmake。同时,项目脚手架使用私人仓库。
# 构建的第一步,指定 ubuntu:22.04 为 builder,用于编译项目
FROM ubuntu:22.04 AS builder

# 指定工作目录为 /app,指定 vcpkg 的目录为 /app/vcpkg
WORKDIR /app
ENV VCPKG_ROOT=/app/vcpkg

# 预先下载需要的包
RUN apt-get update -y
RUN apt-get install -y git curl zip unzip tar pkg-config libxmu-dev libxi-dev libgl-dev libgl1-mesa-glx libglvnd-dev libxt-dev linux-libc-dev make lsb-release software-properties-common gnupg wget

# 下载 vcpkg 并初始化
RUN git clone https://github.com/microsoft/vcpkg.git ./vcpkg --depth=1 && \
./vcpkg/bootstrap-vcpkg.sh

# 利用 mount 来传递 ssh key,生成信任的 host
RUN --mount=type=ssh mkdir -p -m 0700 ~/.ssh && ssh-keyscan ynor.ren >> ~/.ssh/known_hosts

# 下载私人仓库
RUN --mount=type=ssh git clone git@ynor.ren:GroupCommon/vcpkg-registry.git $VCPKG_ROOT/registries/ynor.ren
RUN cp $VCPKG_ROOT/registries/ynor.ren/hack/vcpkg_from_git* $VCPKG_ROOT/scripts/cmake

# 复制当前文件夹到 /app 里
COPY . /app

# 下载 llvm 工具,指定使用 clang-18
RUN wget https://apt.llvm.org/llvm.sh -O llvm.sh \
    && chmod +x ./llvm.sh
RUN bash ./llvm.sh all
ENV CC=clang-18
ENV CXX=clang++-18

# 使用 vcpkg_install 脚本下载项目依赖
RUN --mount=type=ssh ./scripts/vcpkg_install.sh

# 添加工具 cmake 和 ninja 到环境变量
ENV PATH="$VCPKG_ROOT/downloads/tools/cmake-3.30.1-linux/cmake-3.30.1-linux-x86_64/bin:${PATH}"
ENV PATH="$VCPKG_ROOT/downloads/tools/ninja/1.12.1-linux:${PATH}"

# cmake 构建
RUN cmake -S . -B build --preset release && \
    cmake --build build

# 构建的第二步,使用 runtime 为运行时容器
FROM ubuntu:22.04 AS runtime
WORKDIR /app
# 复制构建出的二进制文件到 runtime 中
COPY --from=builder /app/build/apps/cli/tp_cli /usr/local/bin/tp_cli
# 指定运行命令
ENTRYPOINT ["/usr/local/bin/tp_cli"]
这里使用了分部构建的技巧。这样做可以最小化镜像,避免带有不必要的构建工具。
然而,直接这么做显然也会引入一些问题,比如说,当构建出的二进制文件还依赖一些动态链接库的时候,仅仅复制构建出的二进制文件到 runtime 容器中是远远不够的。
我们可以进入构建容器中,使用 ldd 指令来查看这个二进制文件依赖哪些动态链接库:
ldd ./tp_cli
# stdout
        linux-vdso.so.1 (0x00007ffdc4960000)
        libc++abi.so.1 => /lib/x86_64-linux-gnu/libc++abi.so.1 (0x00007f7c63400000)
        libexodus.so.2 => /app/vcpkg_installed/x64-linux-clang/lib/libexodus.so.2 (0x00007f7c627b7000)
        libm.so.6 => /lib/x86_64-linux-gnu/libm.so.6 (0x00007f7c626d0000)
        libGLX.so.0 => /lib/x86_64-linux-gnu/libGLX.so.0 (0x00007f7c6269c000)
        libOpenGL.so.0 => /lib/x86_64-linux-gnu/libOpenGL.so.0 (0x00007f7c62670000)
        libGL.so.1 => /lib/x86_64-linux-gnu/libGL.so.1 (0x00007f7c625e7000)
        libSM.so.6 => /lib/x86_64-linux-gnu/libSM.so.6 (0x00007f7c625dc000)
        libICE.so.6 => /lib/x86_64-linux-gnu/libICE.so.6 (0x00007f7c625bf000)
        libX11.so.6 => /lib/x86_64-linux-gnu/libX11.so.6 (0x00007f7c6247f000)
        libXext.so.6 => /lib/x86_64-linux-gnu/libXext.so.6 (0x00007f7c6246a000)
        libc++.so.1 => /lib/x86_64-linux-gnu/libc++.so.1 (0x00007f7c62370000)
        libunwind.so.1 => /lib/x86_64-linux-gnu/libunwind.so.1 (0x00007f7c62360000)
        libgcc_s.so.1 => /lib/x86_64-linux-gnu/libgcc_s.so.1 (0x00007f7c62340000)
        libc.so.6 => /lib/x86_64-linux-gnu/libc.so.6 (0x00007f7c62117000)
        /lib64/ld-linux-x86-64.so.2 (0x00007f7c63e85000)
        libGLdispatch.so.0 => /lib/x86_64-linux-gnu/libGLdispatch.so.0 (0x00007f7c6205f000)
        libuuid.so.1 => /lib/x86_64-linux-gnu/libuuid.so.1 (0x00007f7c62056000)
        libbsd.so.0 => /lib/x86_64-linux-gnu/libbsd.so.0 (0x00007f7c6203c000)
        libxcb.so.1 => /lib/x86_64-linux-gnu/libxcb.so.1 (0x00007f7c62012000)
        libmd.so.0 => /lib/x86_64-linux-gnu/libmd.so.0 (0x00007f7c62005000)
        libXau.so.6 => /lib/x86_64-linux-gnu/libXau.so.6 (0x00007f7c61fff000)
        libXdmcp.so.6 => /lib/x86_64-linux-gnu/libXdmcp.so.6 (0x00007f7c61ff7000)
对于其中的文件,如果是可以直接靠包管理器下载的,就直接用包管理器。如果不能,则可以直接用复制的方法转移到新的容器中
# for example
COPY --from=builder /app/vcpkg_installed/x64-linux-clang/lib/libexodus.so.2 /usr/local/lib/

RUN apt-get update -y && apt-get install -y libc++abi1 libc++1 libglx-mesa0 libgl1-mesa-glx libsm6 libice6 libx11-6 libxext6 libunwind8 libopengl0
运行
这个工具需要输入文件路径(用于读取)和输出文件路径(用于写入)。显然,直接传入的路径会被容器认为是容器内部的路径,而那里很可能实际上并没有我们提供的文件。解决的方法是,把本地的文件目录挂载上去:
docker run --rm -v $(pwd)/data:/app/data -v $(pwd)/output:/app/output tp:latest --input /app/data/somedata.txt --output /app/output/somedata.txt
在这个命令中,我们使用 -v 将本地的 $(pwd)/data 挂载到容器中的 /app/data,然后在输入目录处给出容器内的路径 /app/data,就可以做到让容器访问本地文件。这里也同理解决了容器输出到本地文件的问题。
小玩具
如果你真的和我一样奇葩,日常用 wsl,wsl 还用的是 arch,而且还不愿意使用 Docker Desktop,那你可以试试这个叫 ducker 的小玩具
sudo pacman -S ducker
它可以帮你在命令行端做一些基本的 Docker 镜像与容器管理操作。
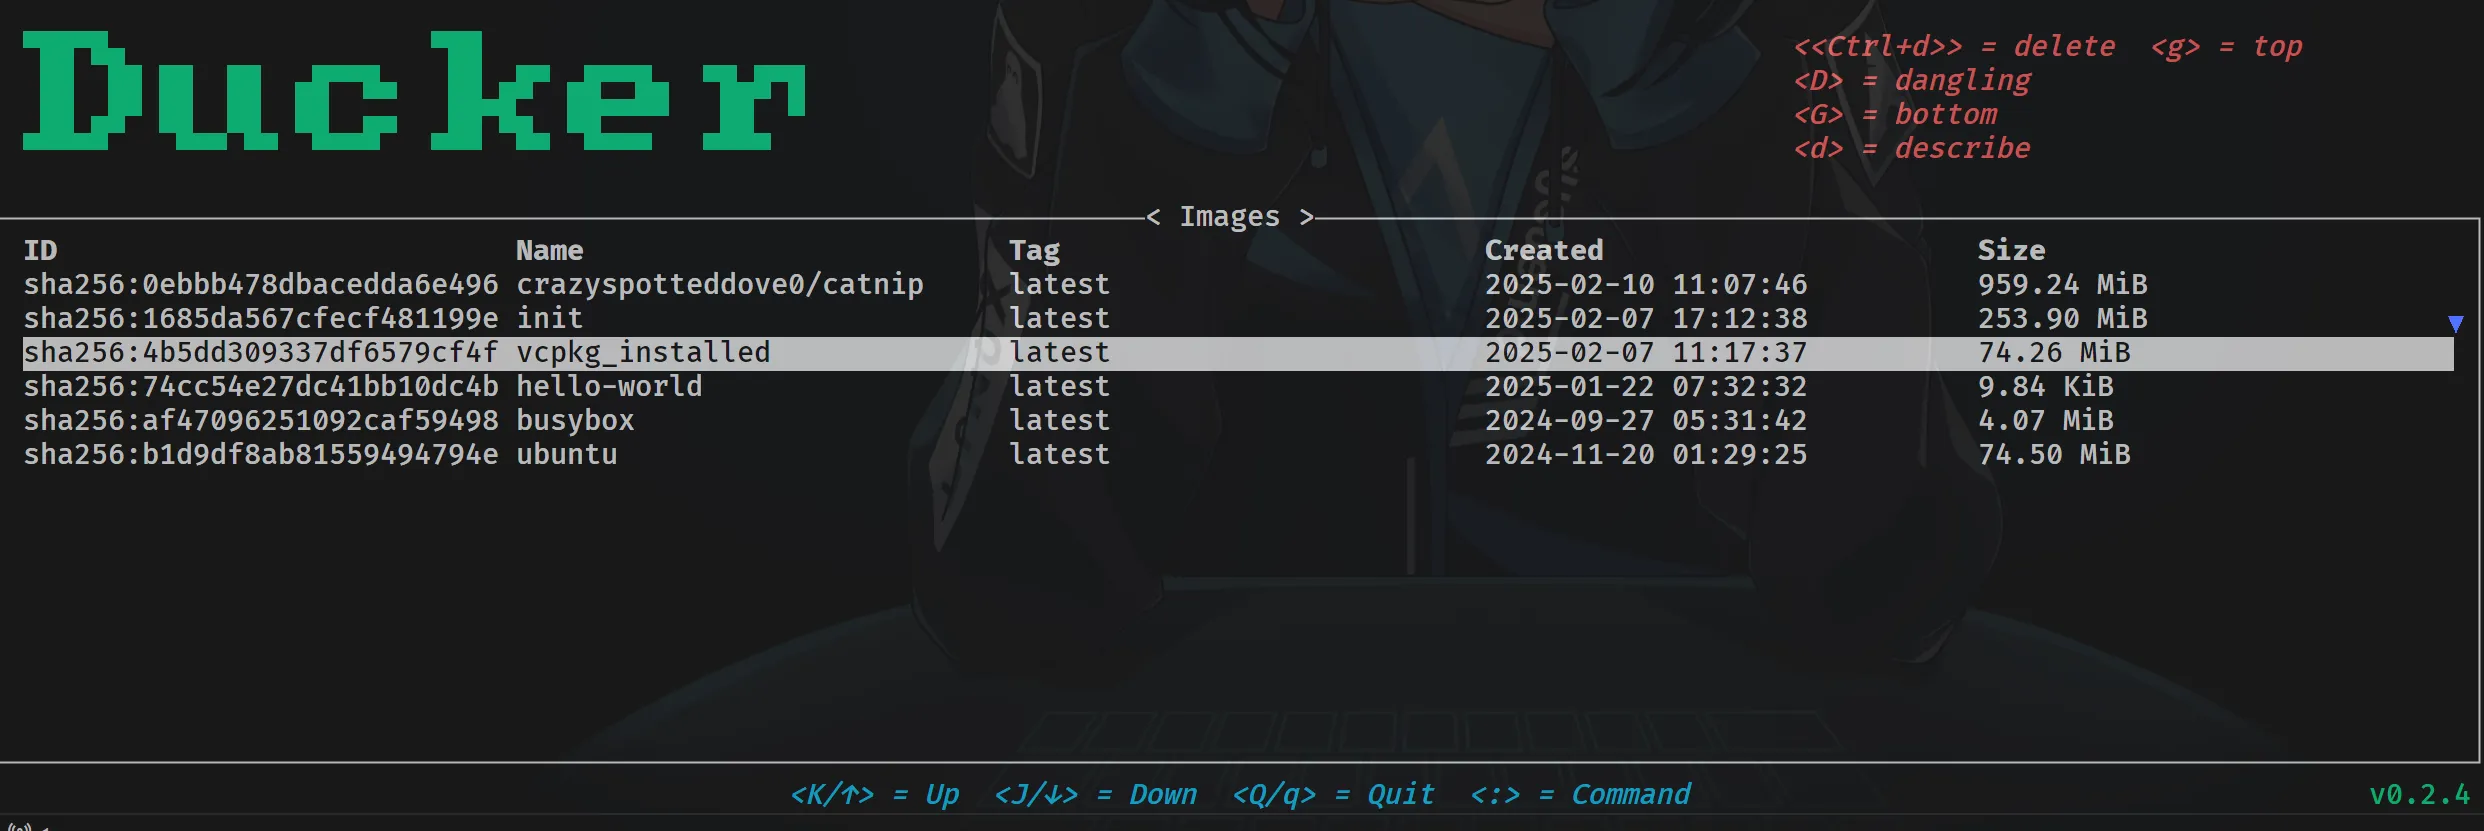
以下使用方法摘自官方文档:
Usage
Ducker is comprised of a set of pages, each of which display specific information about and/or allow interaction with the docker containers and images on the host system.
Top level pages can be navigated to with commands, input via the prompt. Pages can be interacted with using actions; these are input via hotkey inputs.
A legend for common global hotkey inputs is displayed at the bottom of the screen; one for contextual (eg different on each page) hotkey inputs are displayed in the top right.
Commands
The following commands are supported:
| Command | Aliases | Description |
|---|---|---|
images | image | Open the Images top level page |
containers | container | Open the Containers top level page |
volumes | volume | Open the Volumes top level page |
networks | network | Open the Networks top level page |
quit | q | Close the application |
Actions
Global
The following global actions are available on all pages:
| Hotkey | Action |
|---|---|
k/↑ | Navigate up in a list/table |
j/↓ | Navigate down in a list/table |
Q/q | Close the application |
: | Open the command prompt |
G | Navigate to the bottom of a list or table |
g | Navigate to the top of a list or table |
Containers
The following actions are available on the Containers page:
| Hotkey | Action |
|---|---|
Ctrl+d | Delete the currently selected container |
a | Exec into the currently selected container (if container is running)* |
l | View the logs for the currently selected container |
r | Run the currently selected container |
s | Stop the currently selected container |
*NB: exec currently only supports containers with bash installed. The intention is that this will be updated to provide a user option.
Images
The following actions are available on the Images page:
| Hotkey | Action |
|---|---|
Ctrl+d | Delete the currently selected image |
d | Describe the currently selected image |
D | Toggle whether or not to show dangling images (off by default) |
Volumes
The following actions are available on the Volumes page:
| Hotkey | Action |
|---|---|
Ctrl+d | Delete the currently selected volume |
d | Describe the currently selected volume |
Networks
The following actions are available on the Networks page:
| Hotkey | Action |
|---|---|
Ctrl+d | Delete the currently selected network |
d | Describe the currently selected network |
:warning: Network deletion isn’t entirely complete: A failed deletion currently results in a yes/no modal telling you that it couldn’t be deleted. There is no difference between the yes and no results. This is due to the current modal story and a quick and dirty hack to get them set up. Once a generic modal exists this will be patched up!
Logs
The following actions are available on the Logs page:
| Hotkey | Action |
|---|---|
Esc | Return to the containers page |
Configuration
Ducker is configured via a yaml file found in the relevant config directory for host platform. On linux this is ~/.config/ducker/config.yaml.
The following table summarises the available config values:
| Key | Default | Description |
|---|---|---|
| prompt | 🦆 | The default prompt to display in the command pane |
| default_exec | /bin/bash | The default prompt to display in the command pane. NB - currently uses this for all exec’s; it is planned to offer a choice |
| docker_path | unix:///var/run/docker.sock | The location of the socket on which the docker daemon is exposed (defaults to npipe:////./pipe/docker_engine on windows) |
| check_for_update | true | When true, checks whether there is a newer version on load. If a newer version is found, indicates via note in bottom right. |
| theme | [See below] | The colour theme configuration |
If a value is unset or if the config file is unfound, Ducker will use the default values. If a value is malformed, Ducker will fail to run.
To create a fully populated default config, run ducker with the -e/--export-default-config flag; this will write the default config to the default location, overwriting any existing config.
Themes
By default, ducker uses the terminal emulator’s preset colours. However, it is possible to set a custom colour theme in config. This is set in the theme section of the config file. The following table describes the theme options. The default theme provides the colours provided in the GIF in this README.
| Key | Default | Description |
|---|---|---|
| use_theme | false | When true uses the colour scheme defined in config, when false uses the default terminal colours |
| title | #96E072 | The colour used for the Ducker font in the header |
| help | #EE5D43 | The colour used in the help prompts in the header |
| background | #23262E | The colour used in the background |
| footer | #00E8C6 | The colour used for the text in the footer |
| success | #96E072 | The colour used for a successful result |
| error | #EE5D43 | The colour used for an error result |
| positive_highlight | #96E072 | The colour used for highlighting in a happy state |
| negative_highlight | #FF00AA | The colour used for highlighting in a sad state |
Tmux
Some characters in ducker use italics/boldface. This doesn’t work by default when running in tmux. To fix this, add the following to your add to tmux.conf
set -g default-terminal "tmux-256color"
set -as terminal-overrides ',xterm*:sitm=\E[3m'